DIY Paper Beads
Cost: $$1
Equipment
- 1 Pair of scissors
- 1 ruler
- 1 Pencil
Ingredients
- 1 sheet craft paper
- 1 stick school glue
Instructions
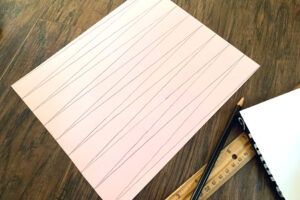
- Draw the bead template.Start with an 8.5x11-inch paper and cut it to be 10-inches long. Along the short side, measure and mark every 1-inch from left to right. (You’ll have a half-inch on the end.) Rotate the paper and repeat making marks from left to right. Use the ruler to connect the marks, making long triangles.
- Cut out each paper strip.Use scissors to cut along all the lines, separating the triangles. The 2 half-sized triangles on the ends can be discarded.

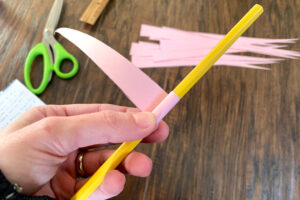
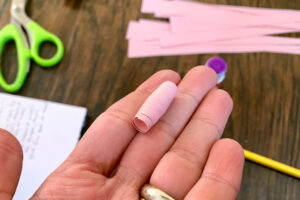
- Wrap the paper around a pencil.To make a bead, wrap a paper triangle around a pencil, starting at the wide end with the pretty side of the paper facing out. Unroll the paper, then roll it back up while applying glue down the whole length. Be careful not to put glue between the paper and pencil. Remove the bead from the pencil and allow the glue to dry.
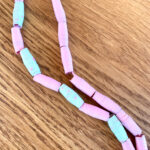
- Use beads to make necklaces and bracelets.Repeat the process to make as many beads as you like. String the beads onto a length of yarn, elastic, or ribbon - or use them to make other bead crafts!
https://www.messymommacrafts.com/paper-beads-diy/
Copyright © Messy Momma Crafts | Kenarry, LLC