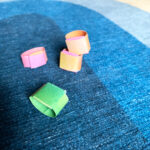
Paper Ring Origami
Servings: 1 ring
Cost: $1
Equipment
- 1 paper trimmer or pair of scissors
- 1 ruler optional
- 1 Pencil optional
Ingredients
- 1 piece paper
Instructions
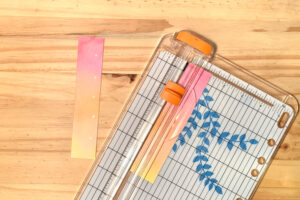
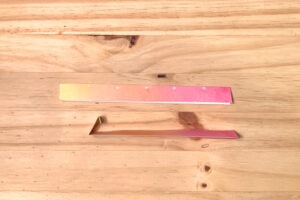
- Cut the paper to size.Start by cutting the paper to 6x1.5-inches. I used a paper trimmer, but if you don’t have one, you can use a ruler to measure and mark with a pencil, then cut out with scissors.
- Fold in half.With the blank/back side facing you, fold the paper in half from top to bottom. Crease the edge.

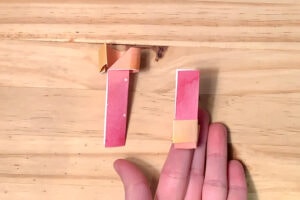
- Fold a square on the end.Fold the left end away from you about 1/4-inch, then again about 1/2-inch. This should create a little square on the left end.
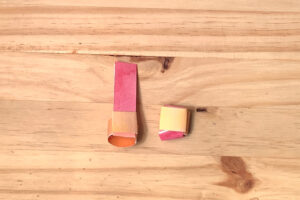
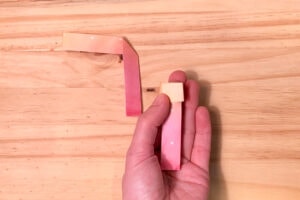
- Create an L-shaped angle.With the little square fold still on the left and facing away from you, fold the right end down at about the middle into a right angle.

- Wrap the ring hole.Roll the right end toward the left creating a hole that will fit around your finger. The end should line up with the box in the back.If you folded in exactly the middle for the last step and it’s too small, move that fold a bit to the right; if it’s too large, move that fold a bit to the left. In general, the middle should fit most kids.
- Wrap the long flap.Open the small square and fold the long flap up between the square and the ring. Close the small square and tuck that little end back under.
- Wrap and secure the end flap.Take the long flap and fold it down through the inside of the ring, then back up. Tuck the small end into the square. You may need to fold the end to make sure it all hides inside the square.