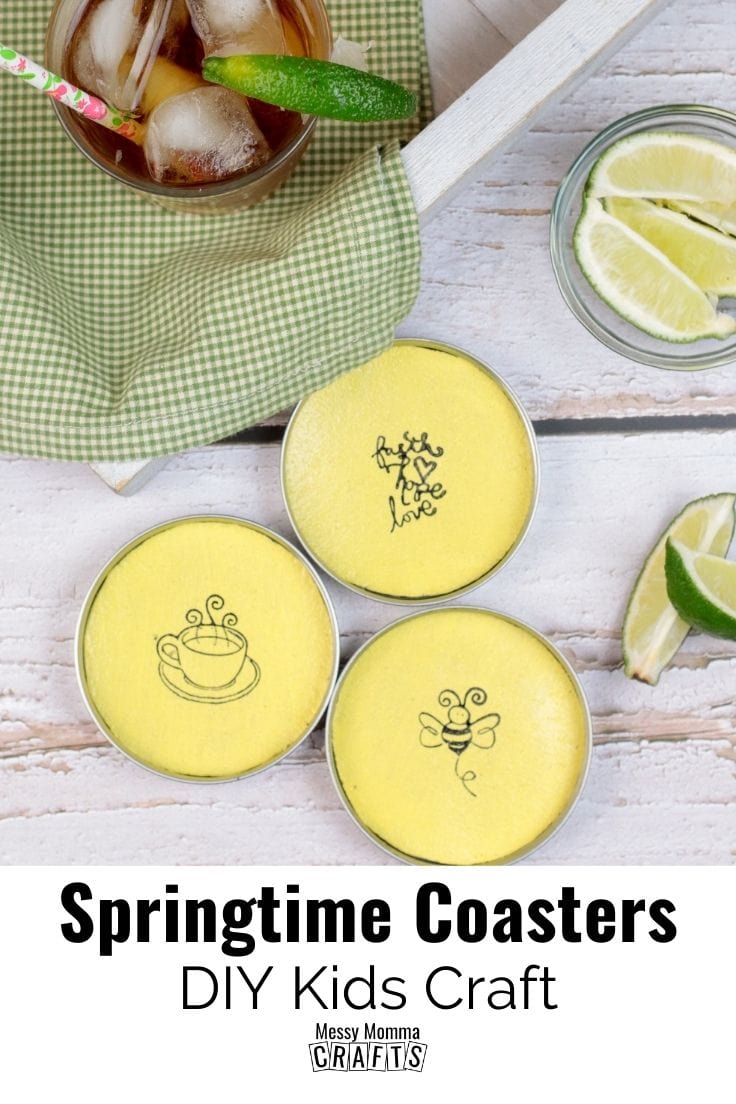
These DIY mason jar coasters are a fun craft idea to do with your kids while you enjoy these beautiful spring mornings!
I’ve been seeing a lot of mason jar-inspired craft ideas on Pinterest lately. So, I thought I’ll transform the lids of my mason jars into cute custom coasters to keep up with the trend.
After you make these cute coasters, make some DIY seed bombs. Spring is all about planting things and watching them sprout up!
Disclosure: This blog post contains affiliate links for products or services we think you’ll like. This means if you make a purchase from one of these links, Messy Momma Crafts will make a small commission at no additional cost to you. All opinions expressed are derived from personal experience.
Back when I was a child, we used to travel to my grandma’s farmhouse for the holidays. These coasters brought on pure nostalgia for those amazing days. Stick with me to find how you can create special crafting memories with your kids too!
How To Make DIY Springtime Coasters
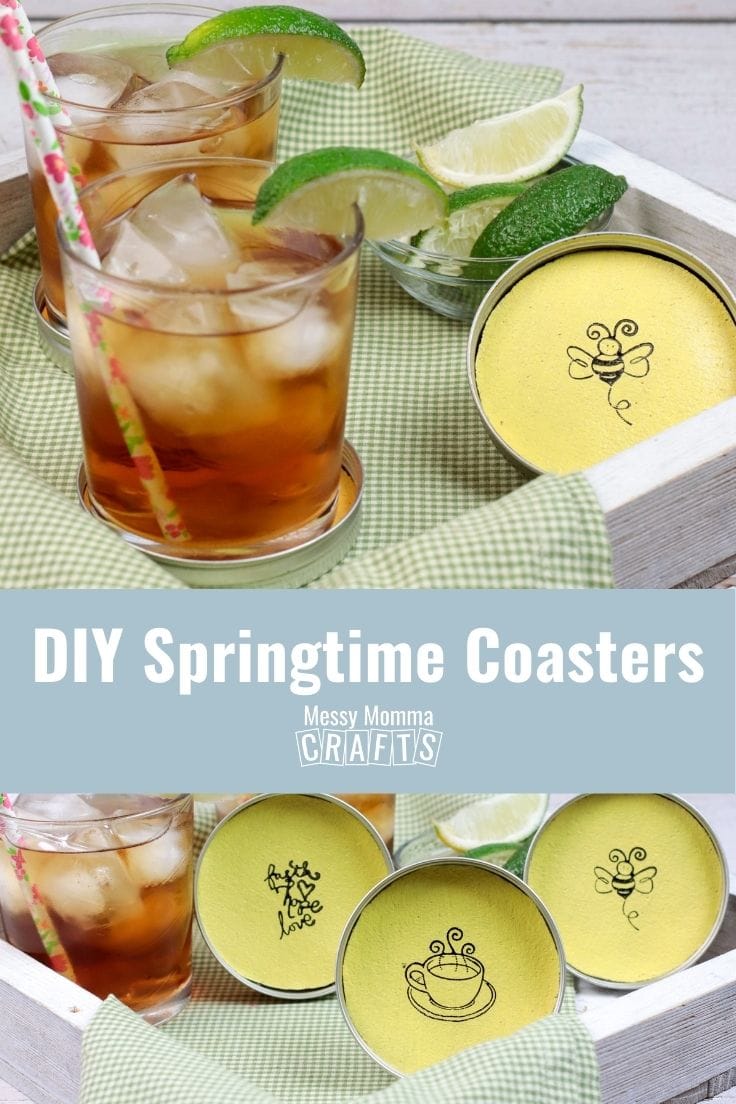
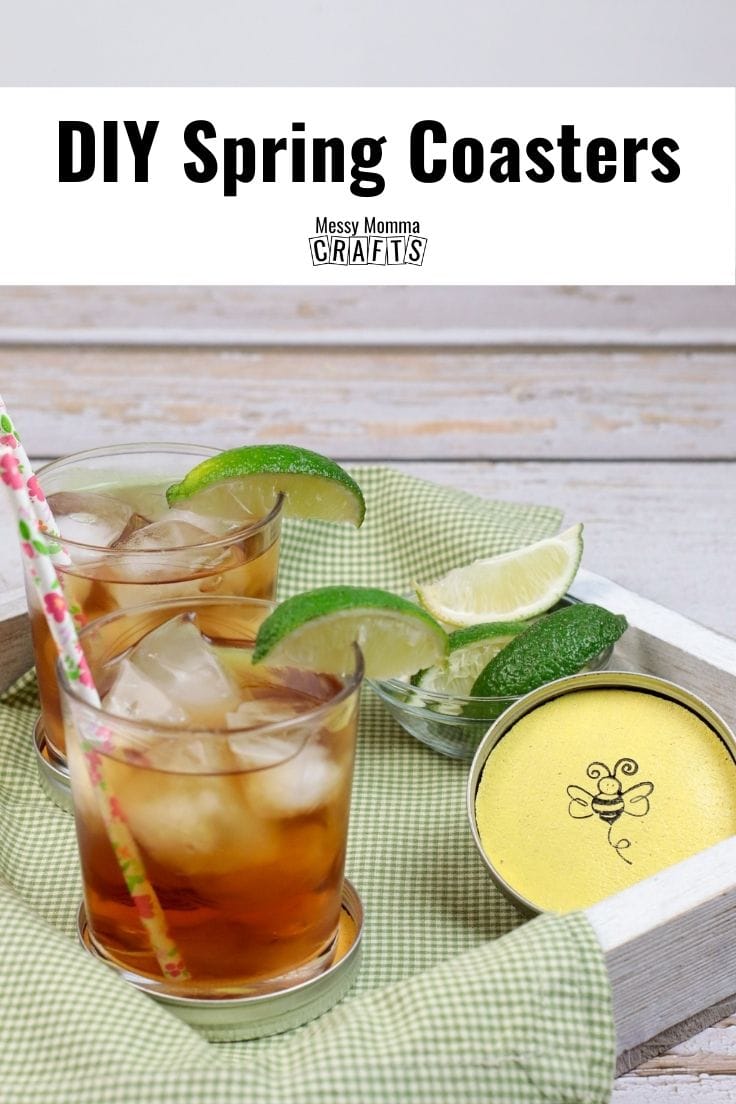
I love eating grilled BBQ in our backyard and spending time with family every once in a while. Last week, I wanted to add some DIY décor in the backyard patio to spruce things up a bit. Let me tell you, these Springtime coasters were a perfect addition to our patio table.
I love doing DIYs that can be used around the house. These coasters protected my beautiful patio table from drink stains AND accentuated the aesthetics in my backyard.

What You Need:
All of the exact amounts and the step-by-step tutorial are in the printable craft card at the bottom of this post. First, here is a quick list of what you’ll need from the store.
- Mason jar rings & lids
- Waterproof solvent ink pad
- Rubber stamps
- Non-toxic acrylic paint
- Craft foam brushes
- Mod podge
- Cork
- Parchment paper
- Pencil
- Scissors
- Hot glue gun
DIY Coaster Tips
These DIY Springtime coasters are unbelievably cheap and oh so simple to make! They can also be used as adorable housewarming gifts for your friends and family. You can also come up with so many different versions of this craft idea to suit your needs, the possibilities are limitless.
Before you get started, here are some important tips that I think will help you out!
Tip #1 – Mod Podge Alternatives
Mod Podge is a superior version of craft glue. It acts as a glue as well as a sealer. Moreover, it is way stronger than regular glue which means the DIY products you make with Mod Podge last longer. It might be more expensive, but I believe it’s worth it.
Nevertheless, if you don’t have Mod Podge lying around and a quick trip to Target isn’t possible, you can always substitute it with PVA glue.
Although, make sure you NEVER use regular glue. When I started doing DIY crafts, I didn’t know the glue played an important role in the durability of the products I made. In the end, the home décor items started peeling off and yellowing horribly. I had to throw them away, with a heavy heart. That’s when I realized that I needed to shift to a stronger glue to increase the lifetime of my crafts.
Tip #2 – How To Handle The Hot Glue Gun
Hot glue guns are extremely handy and serve as the base of thousands of DIY projects. Although, it can cause burns if it’s not handled correctly. Here are a few tricks I use to avoid injuries:
- Do not let little kiddos handle the machine. The melted glue is extremely hot and can cause blisters.
- Once you apply the glue to a surface, allow it to cool for a minute before you touch it.
- Keep the gun above a sheet of paper or cardboard to prevent clean surfaces from drips.
DIY Mason Jar Coasters Step-By-Step Pictures
All of the exact steps are in the printable craft card at the bottom of this post. Here are some photos of the entire process – make them along with me!
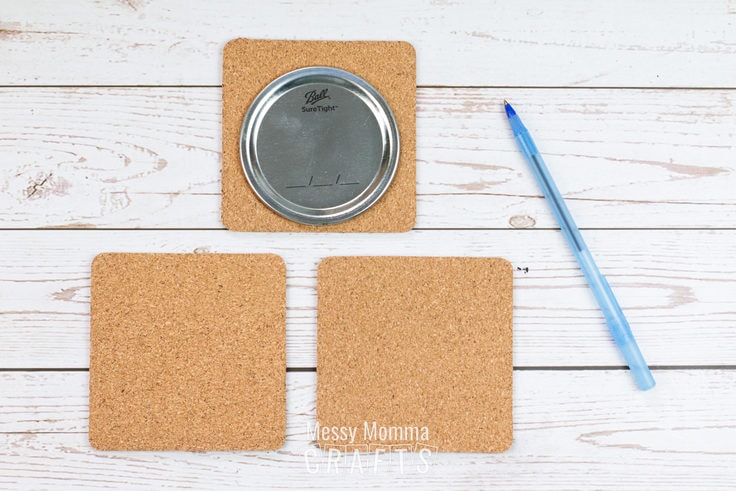
Trace your mason jar lid around the cork with a pencil. Cut each piece carefully with a pair of scissors.

Put the cork on parchment paper so you can get as messy as you would like to. Start painting each

After covering both sides of each cork with Mod Podge, attach each piece to the inside of the mason jar lids.
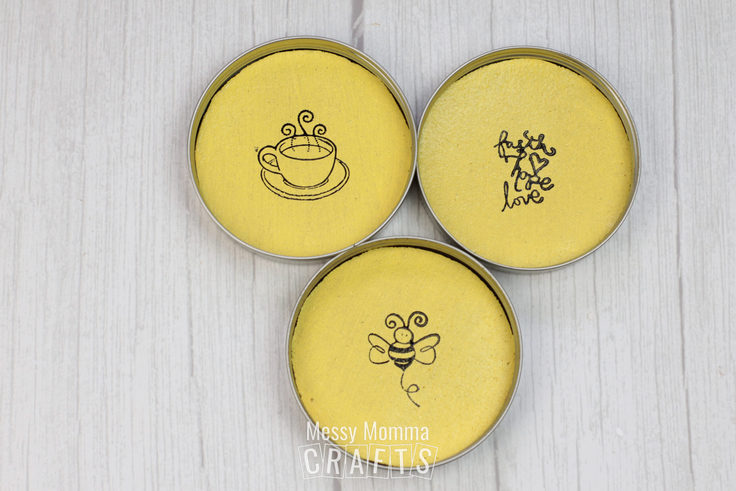
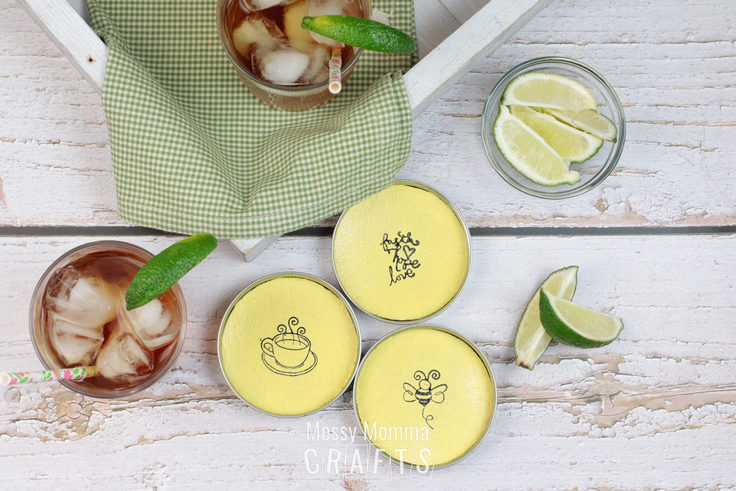
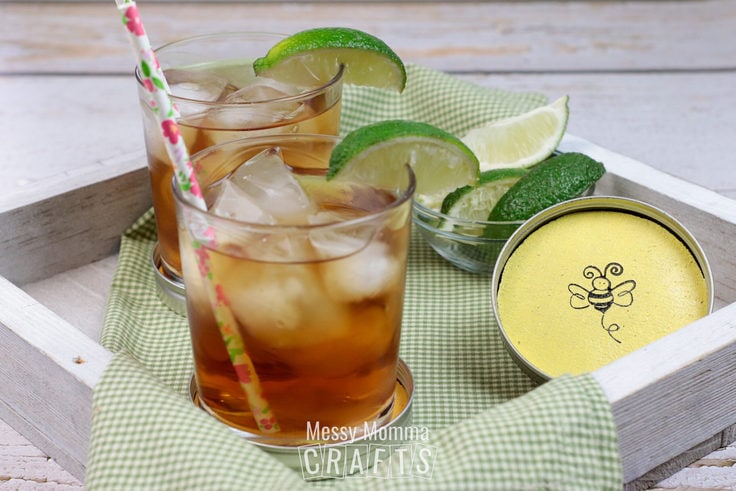
Voila! These coasters will definitely boost your patio’s aesthetics.
DIY Mason Jar Coasters
Equipment
- Craft foam brushes
- Non-toxic acrylic paint
- Mod podge
- Hot Glue Gun
- Scissors
- Pencil
Ingredients
- 3 mason jar rings & lids wide mouthed
- 1 Permanent waterproof solvent ink pad
- 4 Rubber stamps
- 1 piece Cork
Instructions
- Take one of your mason jar lids and using your pencil, trace it around the cork and cut. Repeat for each coaster you plan to make.
- Lay your cork circles on some parchment paper and using a brush, paint an even coat of paint and allow to dry completely. I suggest at least 30-60 minutes. If the color isn’t solid as desired, apply one additional thin, even layer and allow to dry COMPLETELY! At least 60 minutes, or even overnight. If not, your ink could streak.
- Once your paint is dry, apply a solid layer of ink to the stamp. Center the stamp onto the cork circle and press and hold for a few seconds and lift. Although this says waterproof and permanent, you still need to let this ink dry COMPLETELY before moving onto the next step. We waited 60 minutes.
- Using a clean brush, completely cover each cork circle with a thin, even layer of Mod Podge and allow to dry completely (I suggest at least 60 minutes). Be sure to coat both sides. I suggest giving each one two coats.
- Plug in your hot glue gun and allow it to warm up before using. Using your hot glue gun, attach each of the cork circles, stamped side up, to the inside of each of the mason jar lids. Wait about a minute and you now you are ready to enjoy your new DIY Stamped Mason Jar Ring Coasters!
Enjoying our crafty ideas? Subscribe today to receive our free guide, “From Fridge to Keepsake: 8 Clever Ideas to Preserve Your Child’s Artwork,” plus weekly updates and exclusive offers — all for FREE!
More DIY ideas
If you enjoyed this DIY mason jar coasters idea then you will love these DIY ideas too:
- DIY Bubble Gum Lip Scrub: Our DIY Bubble Gum Lip Scrub is the best smelling way to make your lips smooth for summer
- Front Door Flower Pot: Style your front porch with this Front Door Flower Pot painted with beautiful metallic gold paint.
- Upcycled Coffee Can Planter: This Upcycled Coffee Can Planter is a great way to recycle and bring beautiful plants inside the house.
Leave a Reply