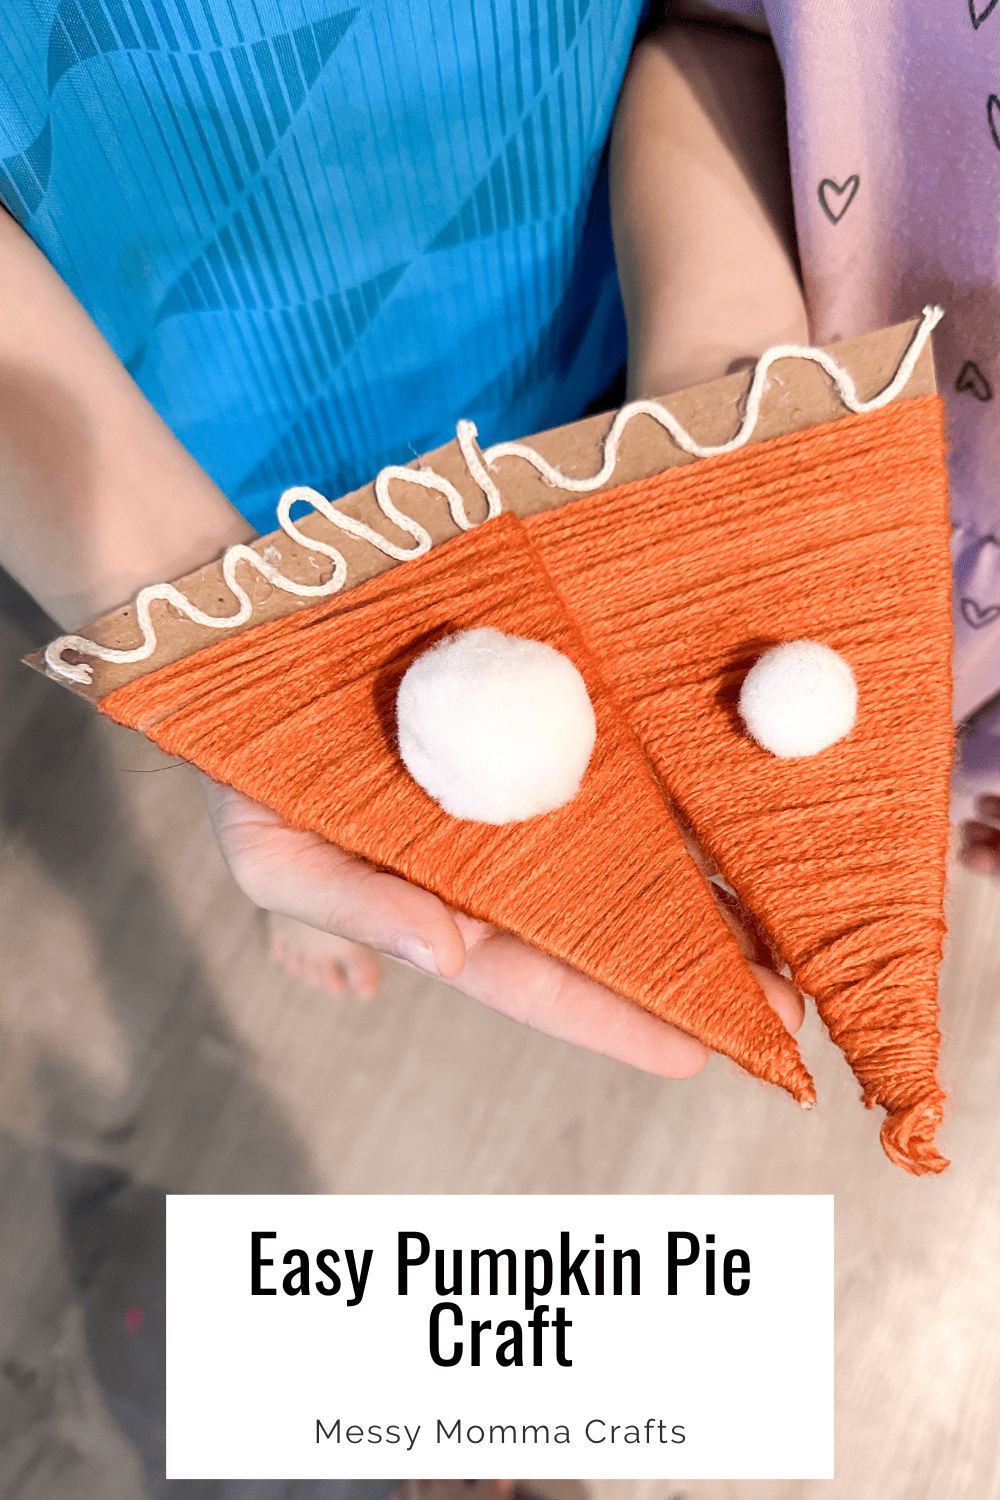
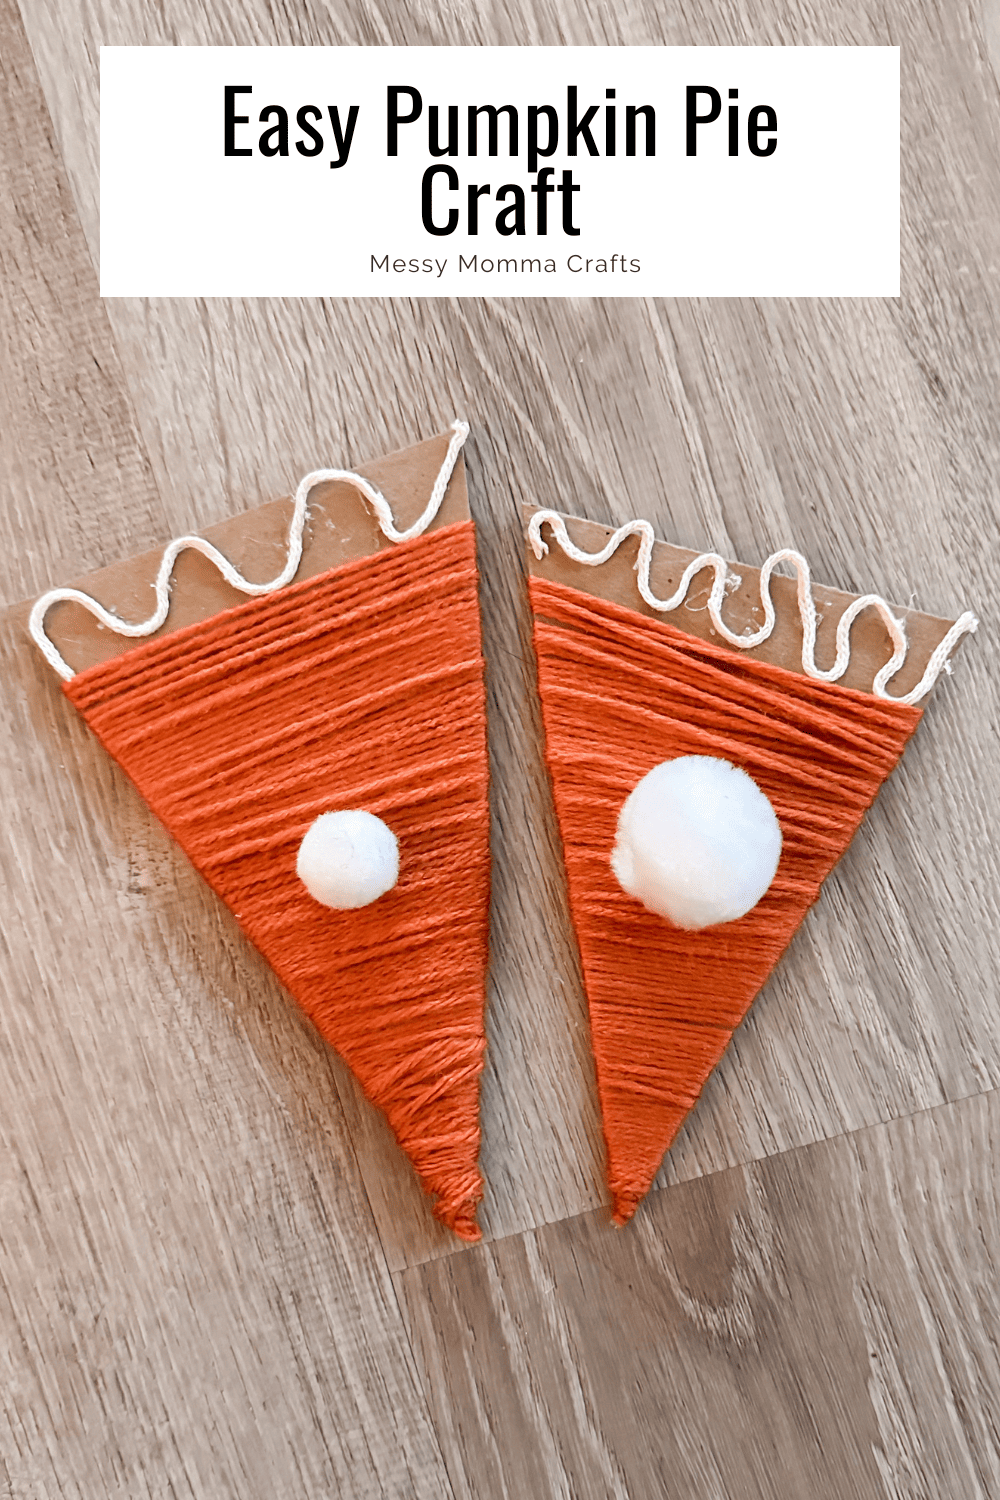
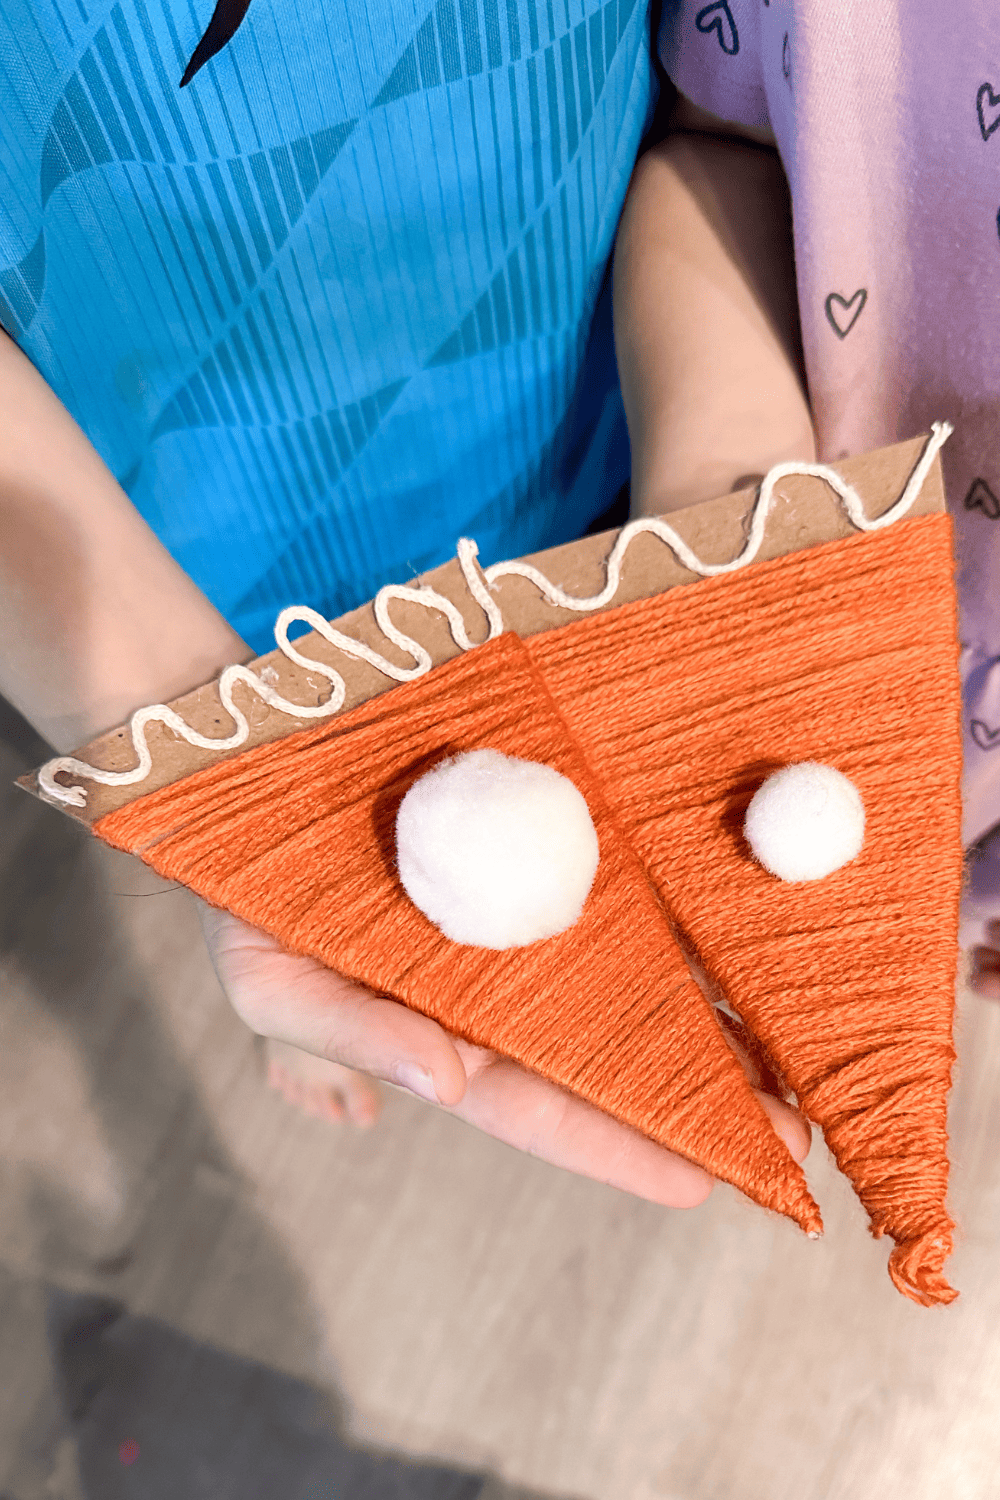
This pumpkin pie craft is so simple but so much fun! The kids will really enjoy creating their own pumpkin pie.
Hello! I’m Amy and I blog over at amylanham.com. I’m always looking for fun crafts to do with my kids to hopefully instill the same love of crafting in them as I have!
Want more ideas like this? Subscribe today and get our weekly newsletter plus other exclusive gifts and offers — all for FREE!
The majority of the crafts we make are super easy and also have a purpose. Meaning most don’t just get thrown away after creating.
There’s nothing wrong with crafts that get thrown away. We do plenty of art and painting just for the joy of making. But I really love a craft that becomes a toy or can be reused in another way.
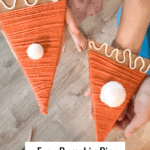
How To Make a Pumpkin Pie Craft
This pumpkin pie craft turns out adorable and your kids will love playing bakery with it too!
What You Need:
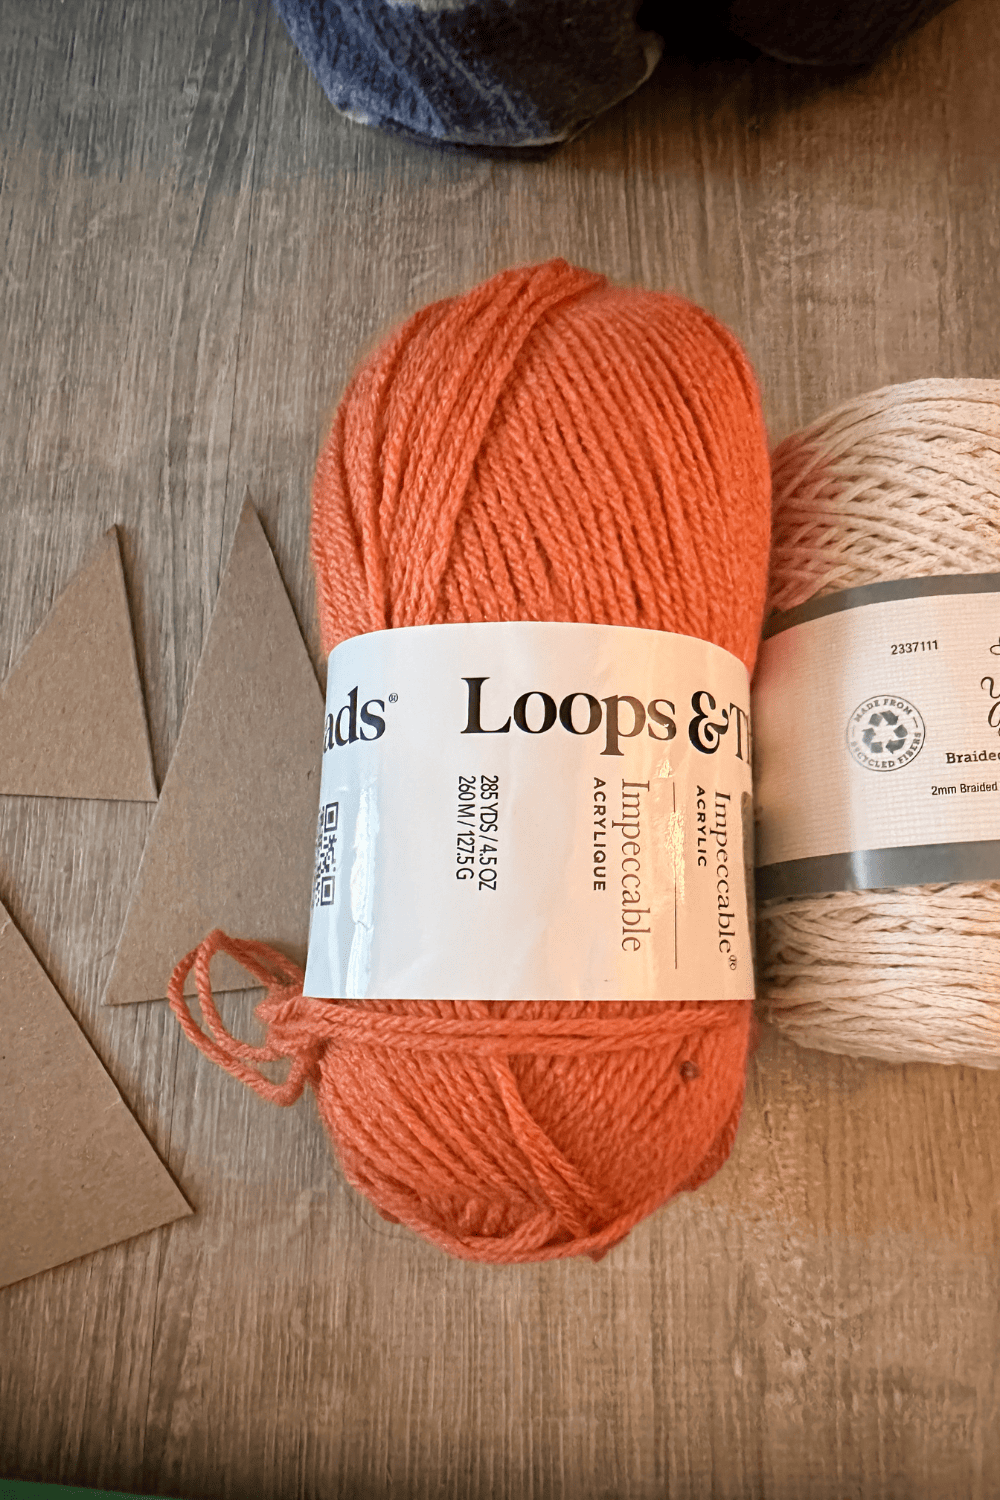
Here’s what you’ll need from the store. The exact amounts are in the printable craft card at the bottom of this post.
Craft Tools Needed:
Supplies Needed:
- Cardboard
- Orange Yarn
- White Yarn or Cording
- Pom Poms
Tips for Pumpkin Pie Craft
Hot Glue or School Glue
I love hot glue. Seriously love it. And it has a few major advantages over school glue.
Of course, one disadvantage hot glue has, is that hot glue can burn. But honestly, I don’t think that should keep you from using hot glue with your kids.

Obviously, use your own judgement. You know your kids best. My kids are 5 and 7 and I have been doing crafts with them that use hot glue for well over a year now.
I am always in charge of the hot glue gun. They tell me where to put the glue, and then carefully attach that item. They have been burned a few times. And they are both more careful because of it.
I like to give them a glue stick or wooden popsicle stick to help push small pieces into the glue. Sometimes the stick will get glued too, but it’s usually pretty simple to wiggle it out.

If you feel your child isn’t ready for hot glue, then school glue can definitely be used. It will just take longer to dry.
Or just attach the orange yarn and then let your child wrap it. There’s not a lot of hot glue used except for the ‘crust’.
What To Do With The Pumpkin Pie Craft After
I think this would make an adorable bunting. Displayed near the dessert table at Thanksgiving! Who could resist a pumpkin pie bunting.
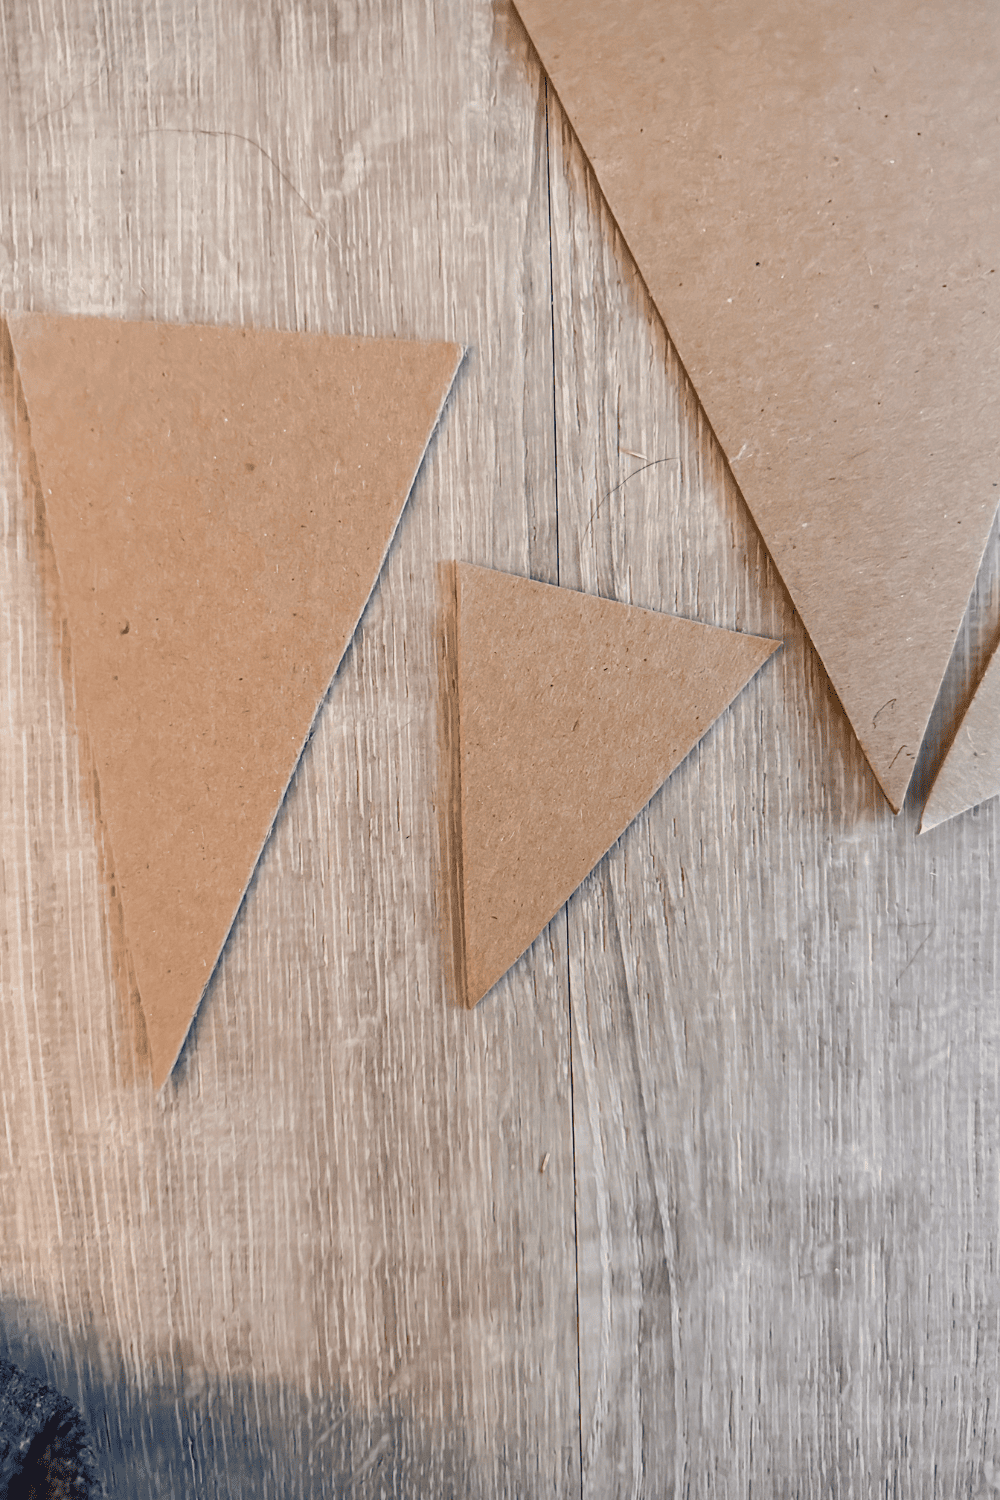
I think different size ‘slices’ gives the craft character, but you could easily cut them to be all the same size and then have the kids decorate them.
My children really enjoy playing restaurant. So as soon as the pumpkin pie craft was done, my daughter threw her pie in the ‘oven’ and then started serving it to people.
The kids would walk around and ask us which type of pie we wanted and then hand us a slice. It makes an adorable play food. And I haven’t seen many play pies around.
Overall the kids had a blast making this craft and also playing with it after!
Pumpkin Pie Craft
Equipment
- 1 Pair of scissors
- 1 Hot Glue Gun
Ingredients
- 1 Orange Yarn
- 1 Cream Cording or yarn
- 3 Triangle Pieces of Cardboard
- 6 White Pom Poms
Instructions
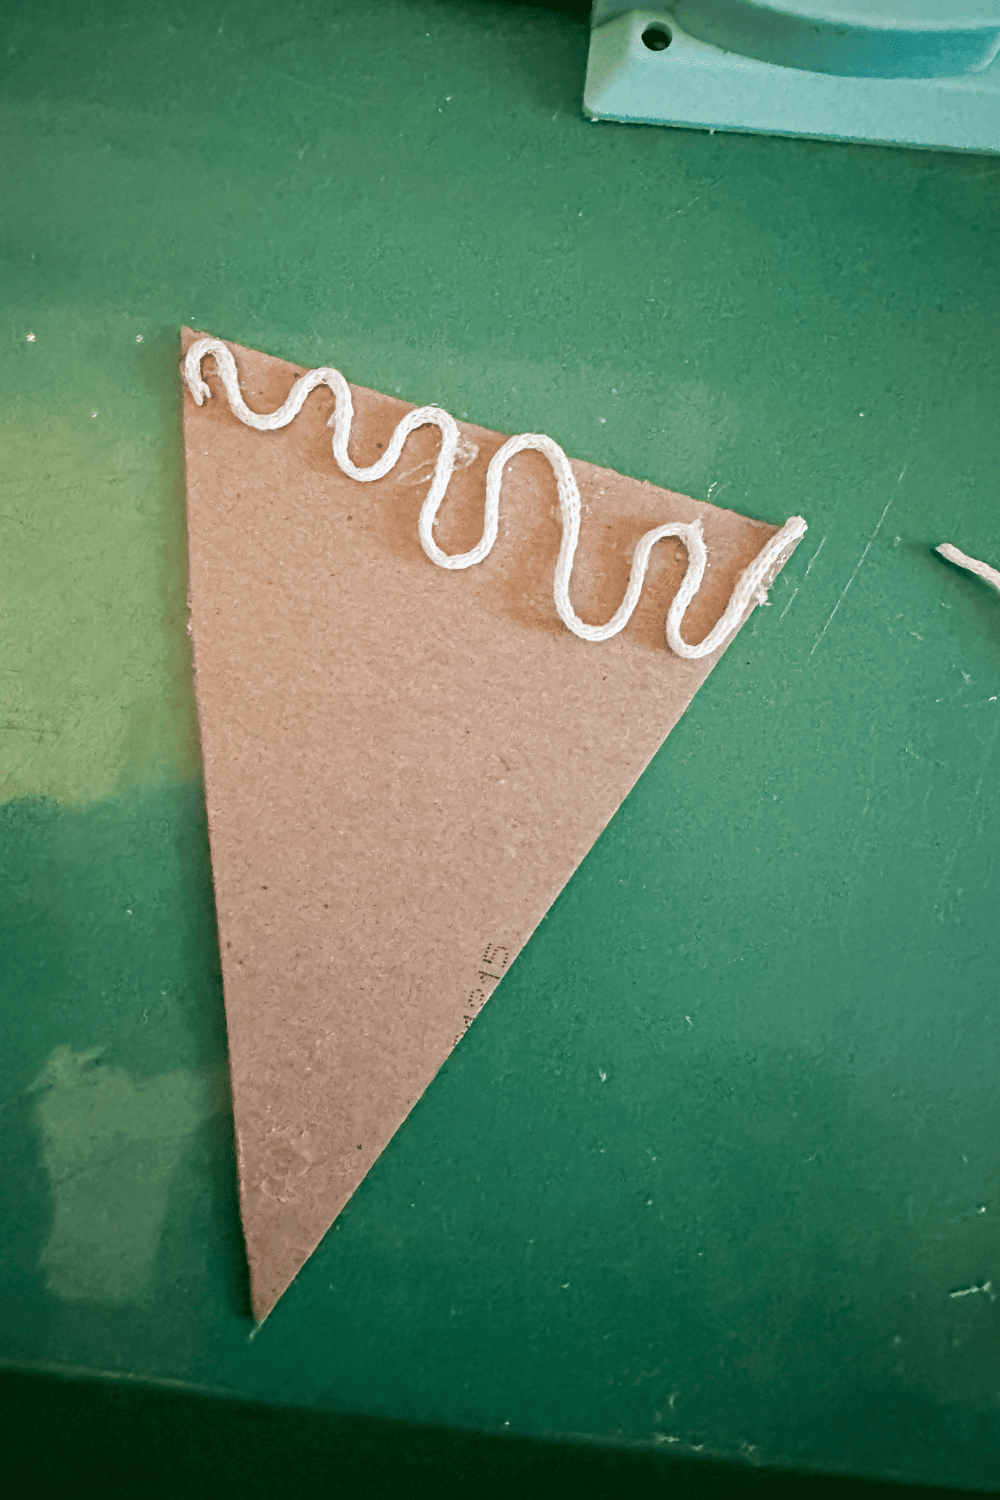
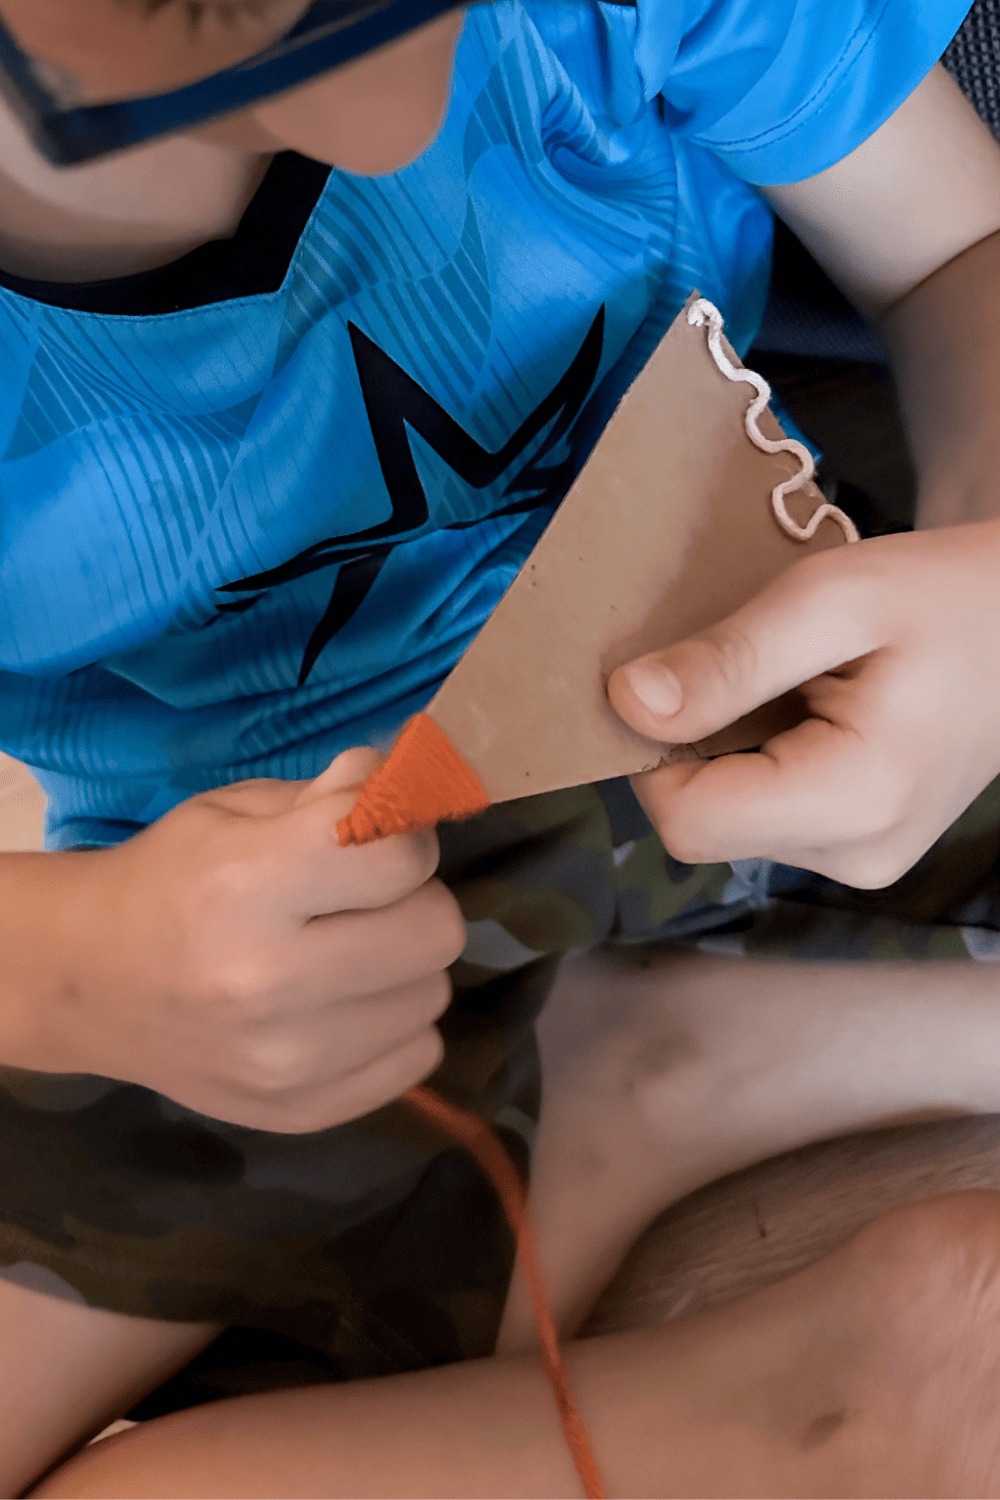
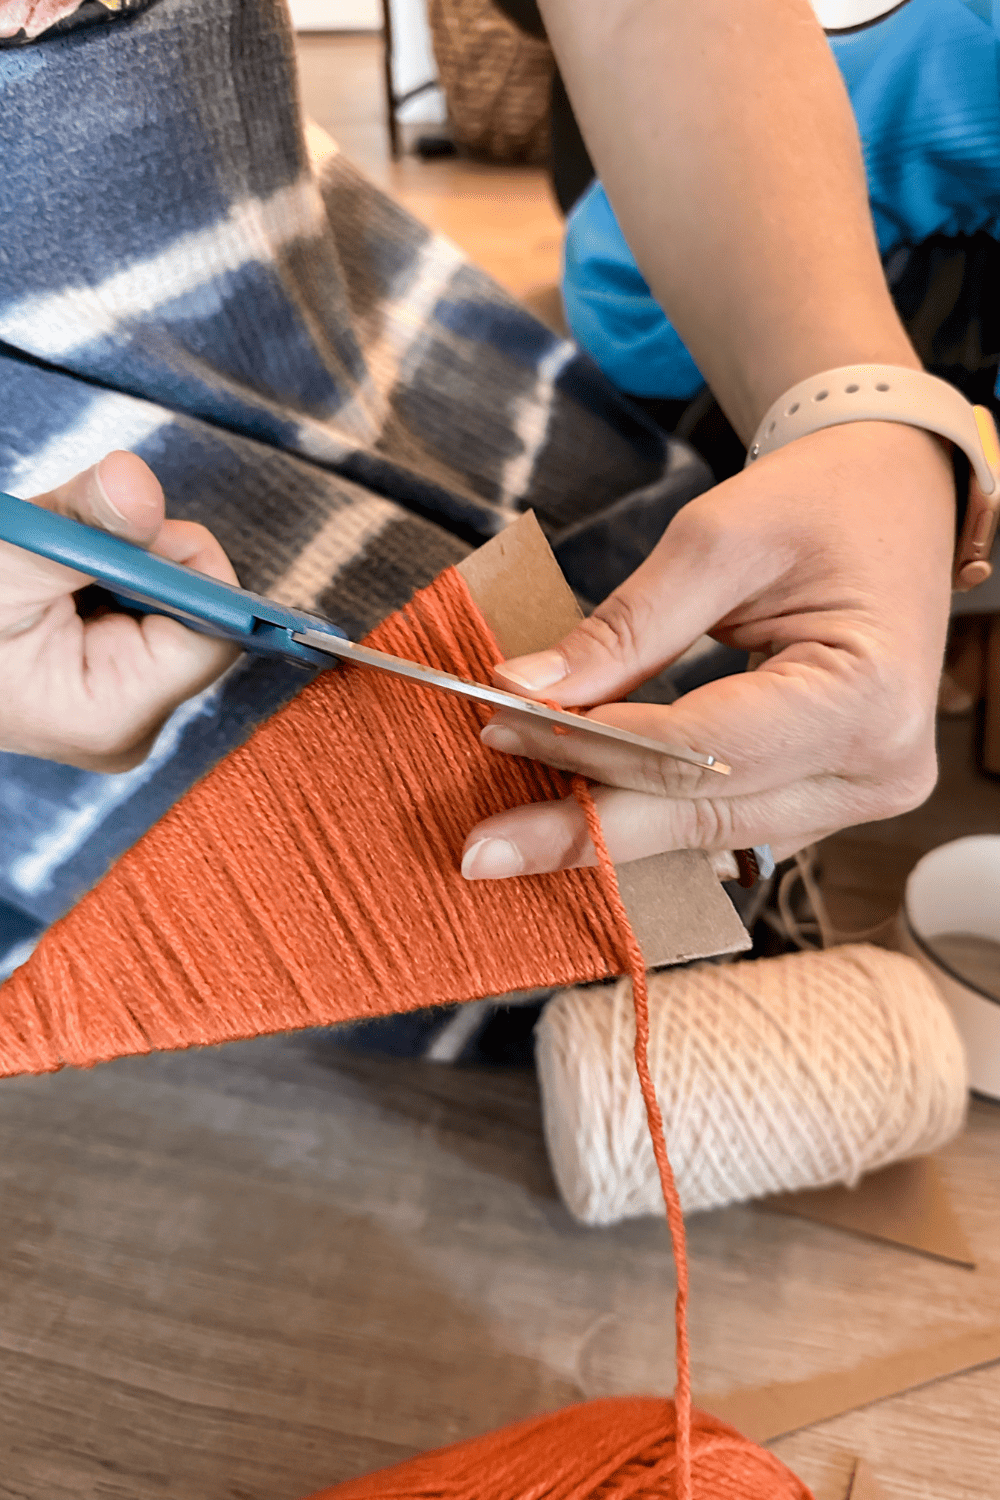
- Starting at the bottom of the cardboard triangle, apply a little hot glue to both the front and the back. Stick the orange yarn into the hot glue and start wrapping the yard around the cardboard.
- Keep wrapping the orange yarn around the cardboard until it is 1 inch from the top of the cardboard. Use hot glue to secure the yarn in place.
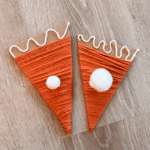
- Use hot glue to attach cream cording to the top of the cardboard in a squiggly line.
- Use hot glue to attach the whipped cream pom poms to the center of the pumpkin pie.
Enjoying our crafty ideas? Subscribe today to receive our free guide, “From Fridge to Keepsake: 8 Clever Ideas to Preserve Your Child’s Artwork,” plus weekly updates and exclusive offers — all for FREE!
What’s Next?
If you enjoyed this pumpkin pie craft you might enjoy these other Thanksgiving crafts.
More Thanksgiving Ideas
If you enjoyed this pumpkin pie craft then you will love these Thanksgiving craft ideas:
Leave a Reply