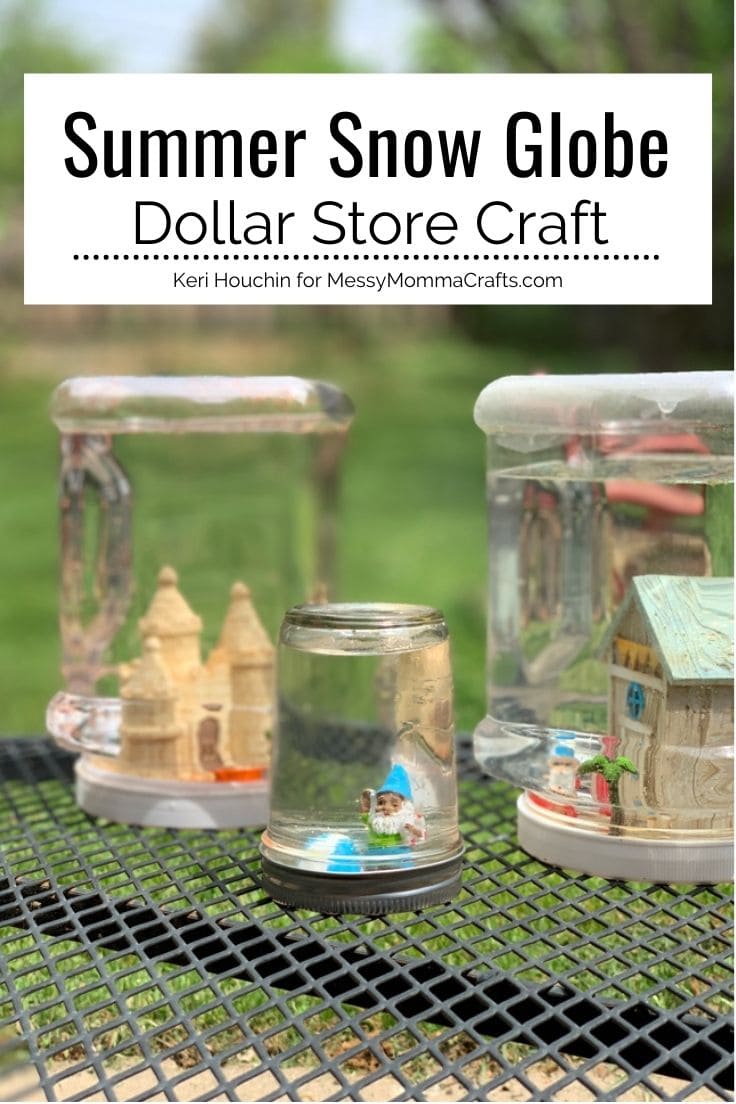
Make a DIY summer snow globe for an easy dollar store craft idea that’s fun for kids and doubles as home decor.
Hello, I’m Keri. Over at my blog Backyard Summer Camp, we’re making fun kids’ crafts at home all summer long! Summer vacation is the best! And whether you’re staying home or taking a trip, it’s fun to have souvenirs of your memories. This summer snow globe is a cute Dollar Tree craft that you can easily customize to make it all your own.
Want more ideas like this? Subscribe today and get our weekly newsletter plus other exclusive gifts and offers — all for FREE!
There’s something about a snow globe that’s magical!
Kids love shaking a glittery globe to watch the glitter swirl. And you may find that older kids and teens have as much fun making this craft as younger kids do.
For more fun snow crafts you can make any time, check out these toilet paper snowmen and this DIY fake snow for a sensory bin!
DIY Snow Globe Ideas
Get creative and customize your snow globe with some of these fun ideas.
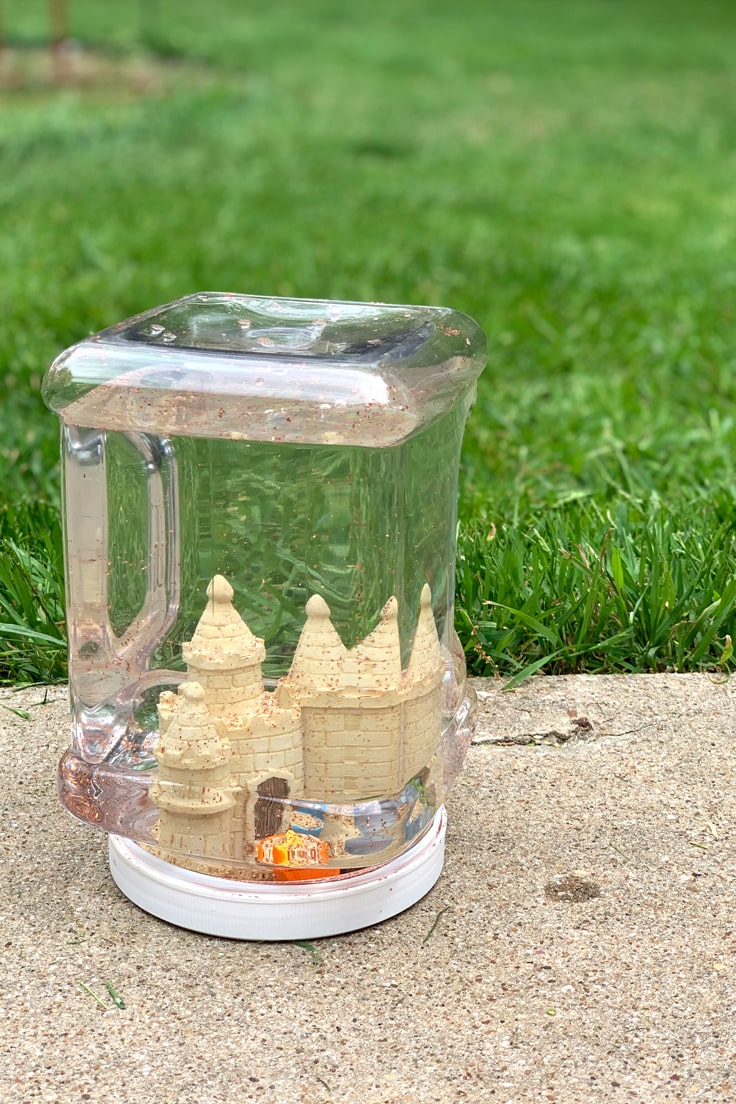
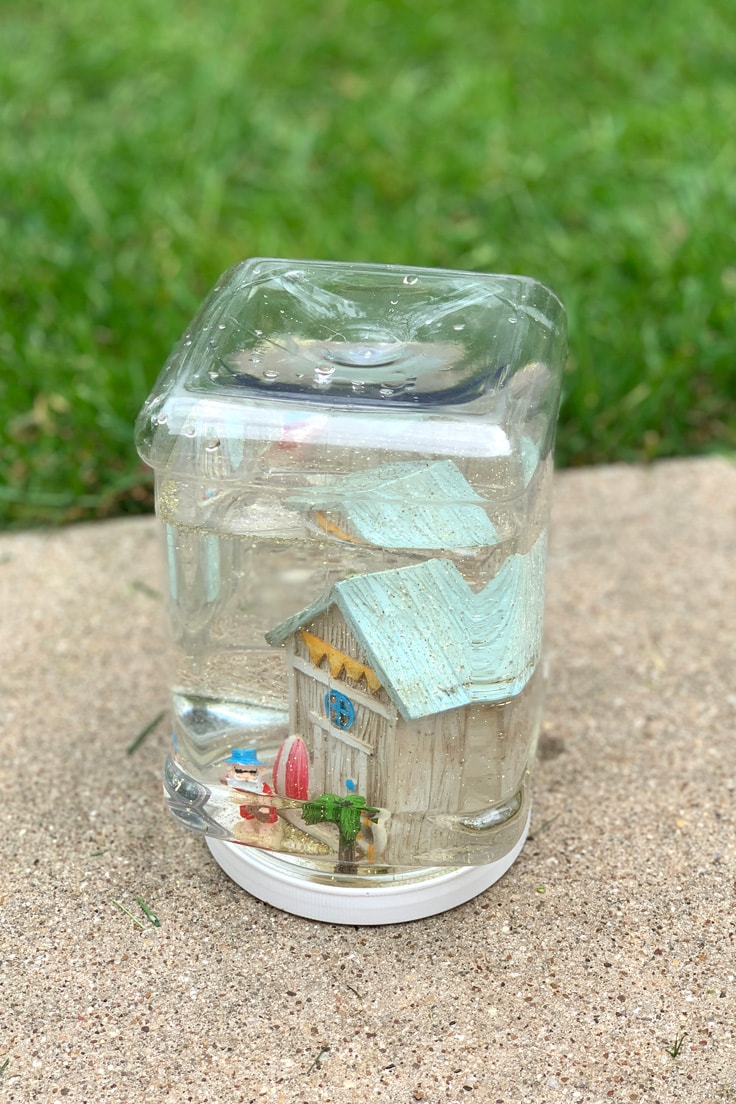
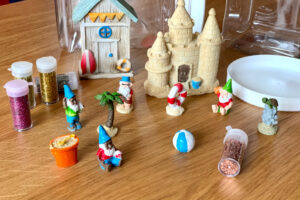
Fairy garden theme.
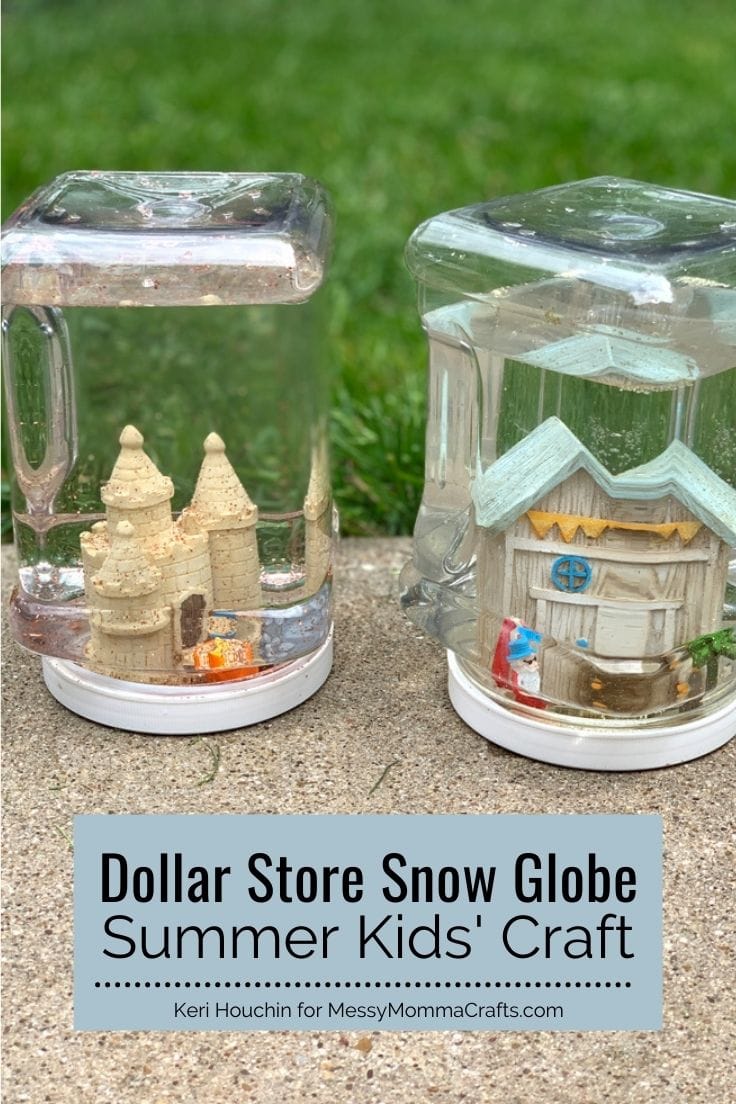
We used fairy garden minis to create a beach scene, but you could use different figures to make it a woodland scene, a pond, or recreate your favorite vacation spot.
Dry display.
Whether you just want to display items differently or avoid mess, you don’t have to add water and glitter.
Collection display.
Pick up items on a nature walk, a trip to the beach, or from your own backyard to use instead of miniatures. Keep in mind some items (like rocks and shells) will hold up better than others if you’re adding water.
Natural terrarium.
Instead of gluing items down, add some dirt and naturally small plants (like moss or a succulent). You’ll need to leave out the water and glitter, but spritz the plants weekly.
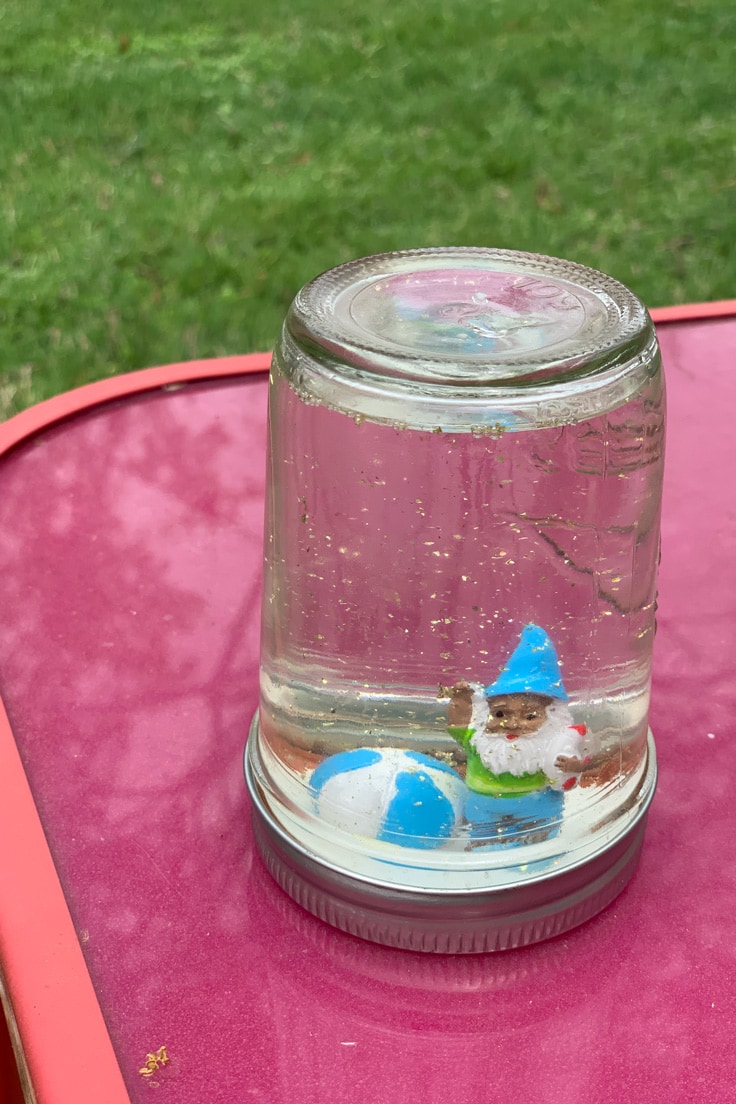
Smaller – or larger!
We chose this size container to fit the miniatures we wanted to use. You can also make it smaller or larger to fit the items you use. (Just remember that a very large one will be difficult to shake because it is heavy.)
How To Make a Summer Snow Globe
Who says snow globes are just for Christmas? Make this fun craft with a summer beach twist!
What You Need:
Here’s what you’ll need from the store. The exact amounts are in the printable craft card at the bottom of this post.
Supplies Needed:
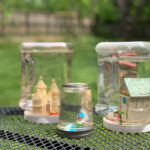
- Container with a water-tight lid – We used a 2 qt. canister for the large ones and an 8-ounce Kerr jar for the small one.
- Small fairy garden miniature figures and accessories – We found these gnomes at Dollar Tree, but there are tons on Amazon too.
- Glitter – Any will do, but we picked colors that look close to sand.
- Waterproof adhesive – We used Loctite Stik’n Seal outdoor adhesive.
- Distilled water
Snow Globe Frequently Asked Questions
What is a snow globe without snow called?
We found that most people still call it a snow globe, even if it’s made with glitter or doesn’t feature a winter scene. It can also be called a glitter globe or water globe.
What goes inside a snow globe? It is toxic?
Store-bought snow globes may be made with a variety of chemicals to both slow the falling glitter and keep the inside clear (some may be toxic, so be careful with a broken one). Some snow globe craft tutorials container glycerin, which is a clear thickening agent made from vegetable oil. If you use the variety intended for baking, it’s safe for your globe too.
Can you make a snow globe without water?
Sure! You might want to leave out the water when making this craft to make it less messy, especially if you’re crafting with a preschooler. Water helps the glitter circulate, but we’ve included several fun variations that you can try too.
What kind of glue is best for a snow globe?
If you’re adding water, it’s essential that your adhesive is waterproof. We used an outdoor adhesive, but super glue or E6000 will also work.
Summer Snow Globe
Ingredients
- 1 container with a water-tight lid
- 3 fairy garden miniature figures and accessories
- 1 bottle glitter
- 1 package waterproof adhesive
- 1 gallon distilled water
Instructions
- Clean and dry the pieces.Start by removing any labels and washing the container and miniature pieces you’ll be using. Test the waterproofness of the container by filling it with water, attaching the lid, and turning it upside down. If it leaks, find our tips for sealing at the end.
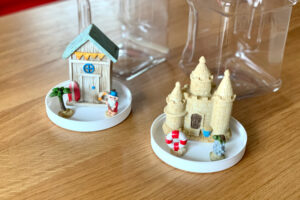
- Glue miniatures to the container lid.Use the outdoor adhesive to attach the miniature pieces to the lid. The should be far enough from the edge that they won’t keep it from closing easily. Allow the pieces to set until the glue is completely dry and the pieces do not move. This may take several hours, depending on your adhesives – ours took about 2 hours.
- Add the water and glitter.When everything is dry, add distilled water to the container, leaving room for the miniature pieces. Add a pinch of glitter.
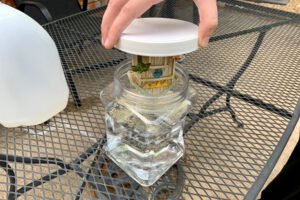
- Close and seal the container.Carefully place the lid on top of the container and screw it closed. If your container leaked at the beginning, you may want to add more glue around the screw top grooves. This will make it water-tight, but you won’t be able to open it to make changes later. We also tried plumber’s tape, which worked okay, but probably wouldn’t make it permanently leak-proof.

Enjoying our crafty ideas? Subscribe today to receive our free guide, “From Fridge to Keepsake: 8 Clever Ideas to Preserve Your Child’s Artwork,” plus weekly updates and exclusive offers — all for FREE!
What’s Next?
If you liked this summer craft, then be sure to check out Backyard Summer Camp for even more easy kids’ crafts.
More RELATED KEYWORD Recipes/Ideas
If you enjoyed making a summer snow globe then you’ll enjoy these grade school crafts too:
Leave a Reply