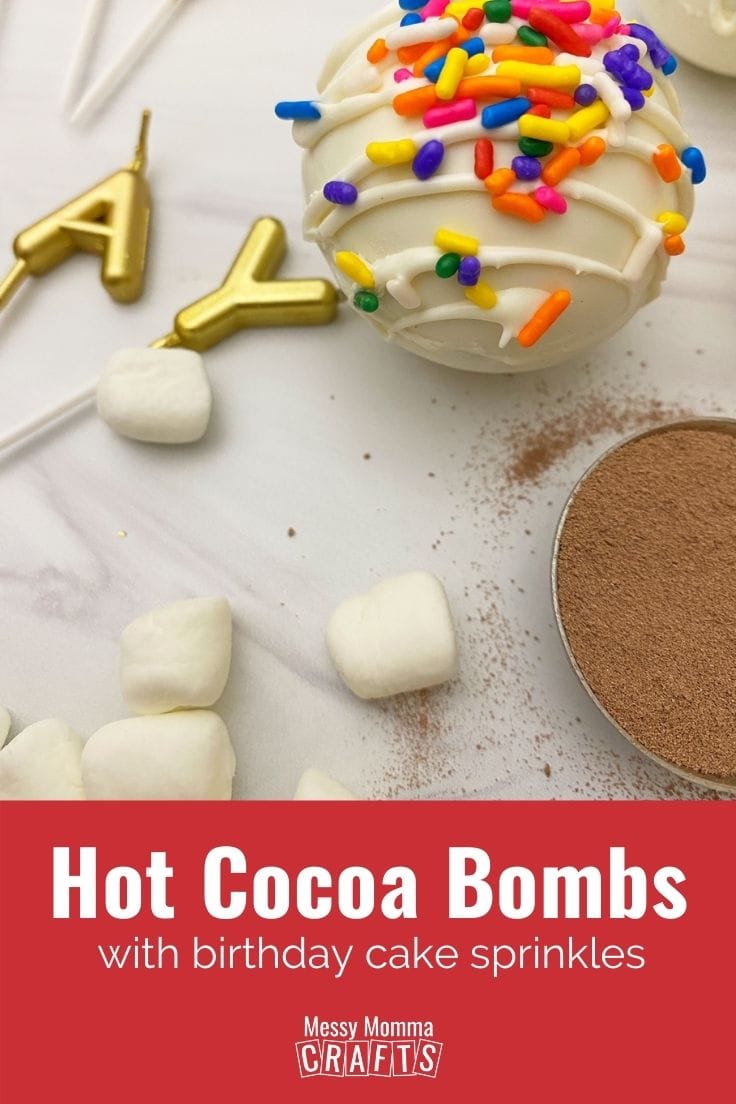
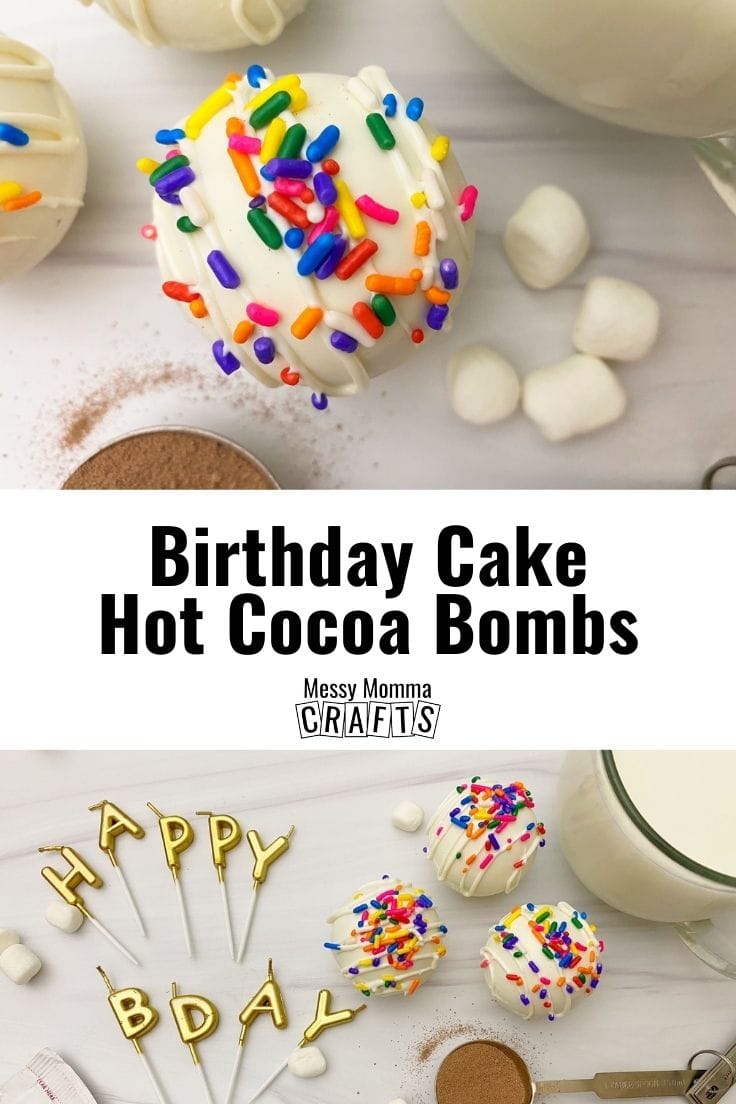
Celebrate your kid’s special day with these birthday cake hot cocoa bombs! These are extremely fun to make and perfect for cold-weather birthdays.
Watching a cocoa bomb transform a mug of hot milk into a delicious cup of hot chocolate is extremely enjoyable for kids and adults. I myself can watch them explode for hours. These birthday-themed cocoa bombs make the best drink for a winter-themed birthday party.
Want more ideas like this? Subscribe today and get our weekly newsletter plus other exclusive gifts and offers — all for FREE!
I came up with this recipe when I decided to add a bit of pizzazz to the traditional cocoa bombs recipe for my son’s birthday party. Let me tell you, it was an instant favorite among the whole family!
For the ultimate birthday treat, serve this hot cocoa for breakfast alongside our unicorn toast! And for a birthday party, print this birthday party BINGO game set!
How To Make Birthday Cake Hot Cocoa Bombs
My family loves sitting around the dining table, sipping on hot chocolate in our cozy PJs and favorite fuzzy socks when it’s cold outside. This recipe is a sure hit among kids and adults alike. After all, who can say no to a perfect steaming cup of pure chocolatey goodness during a winter evening?
What You Need:
Here’s what you’ll need from the store. The exact amounts are in the printable recipe card at the bottom of this post.
Kitchen Tools Needed:
Ingredients Needed:
Hot Cocoa Bombs – Frequently Asked Questions
This recipe is extremely simple and very easy to follow. However, here are a few questions or problems you might encounter in between the process. So, stay with me while I answer a few questions that are commonly asked by people.
Why Do My Cocoa Bombs Keep Breaking?
Chocolate bombs break because of three main reasons:
- Improper chocolate tempering
- Uneven edges
- Setting time
If your cocoa bombs are breaking I suggest using a paintbrush to apply the cocoa to the molds and then letting them chill in the refrigerator until they are ready.
What Chocolate Should I Choose for the Hot Cocoa Bombs?
I used white chocolate in this recipe. However, you can also use candy melts, chocolate chips, or other vegan versions too, but they might not taste as good. Couverture chocolate is also a pretty good choice as it melts and cools fast.
You should make sure you use high quality chocolate with 65% or more cocoa. The melting quality of the chocolate is determined by the amount of cocoa butter and cocoa beans in it.
How Do I Temper My Chocolate?
Tempering chocolate might seem like an easy task. However, it will melt at room temperature and break if its not done correctly. Follow the steps given below for the perfect cocoa bombs:
- Chop your chocolate into little pieces. The smaller, the better as it will melt more evenly.
- Microwave the chocolate for 30 seconds. After it’s done, stir it with a spatula and put it back into the microwave for 15 seconds.
- After 15 seconds, remove the bowl and stir it from outside in. The heat from the outside chocolate pieces will help melt the inside pieces.
- If the chocolate isn’t smooth, keep it back in the microwave for 15 seconds. Stir it until the whole bowl of chocolate is melted and reached a silky texture.
Birthday Cake Hot Cocoa Bombs Step-By-Step Pictures
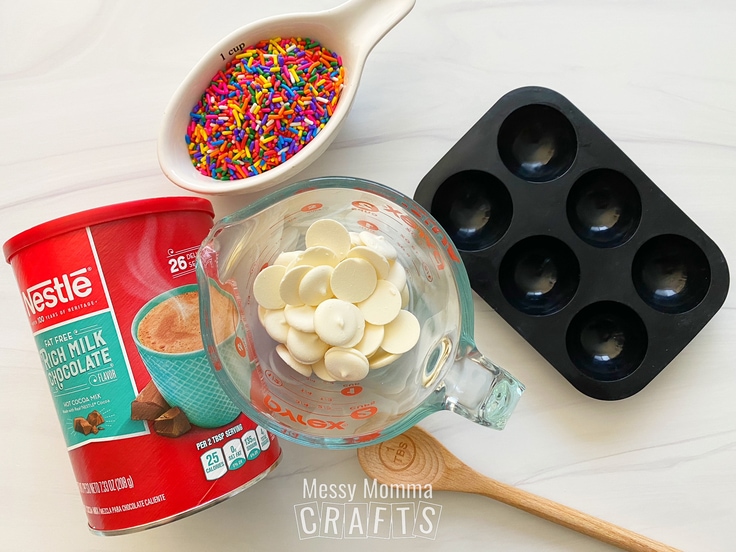
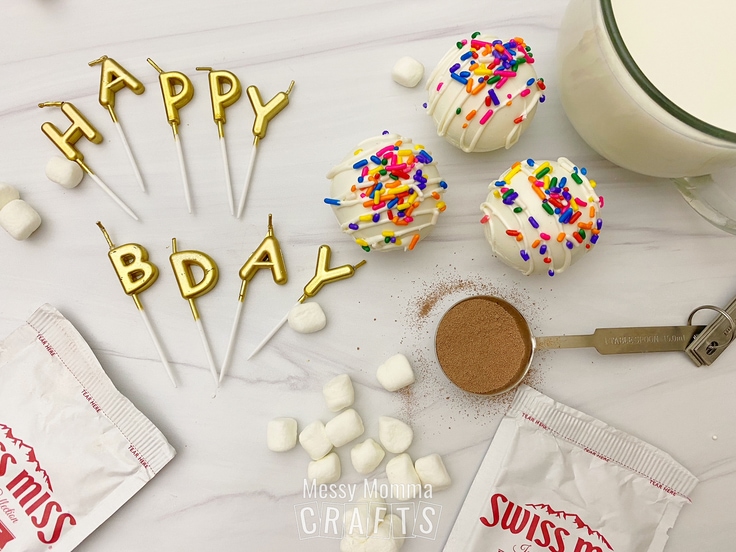
Assemble all your ingredients together.
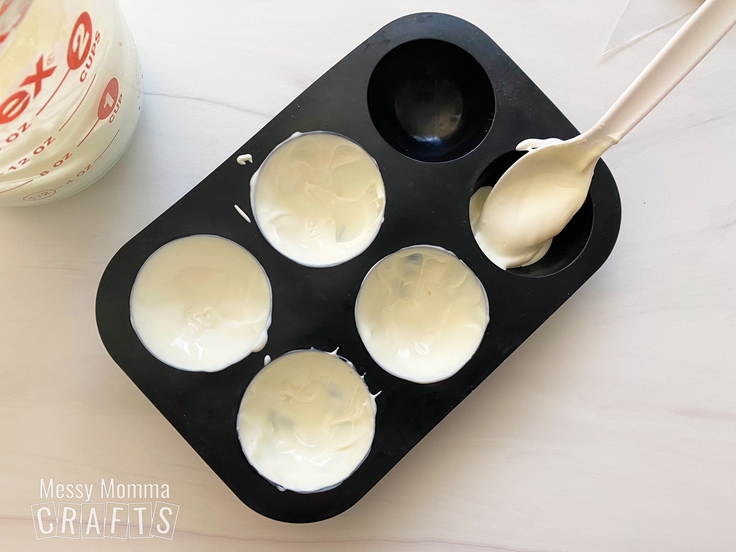
Melt the white chocolate chips and pour the melted chocolate into your silicone molds. Put the mold in the freezer for 2-3 minutes. Take it out and pour your second layer of chocolate into the molds. Freeze it again for a minute.
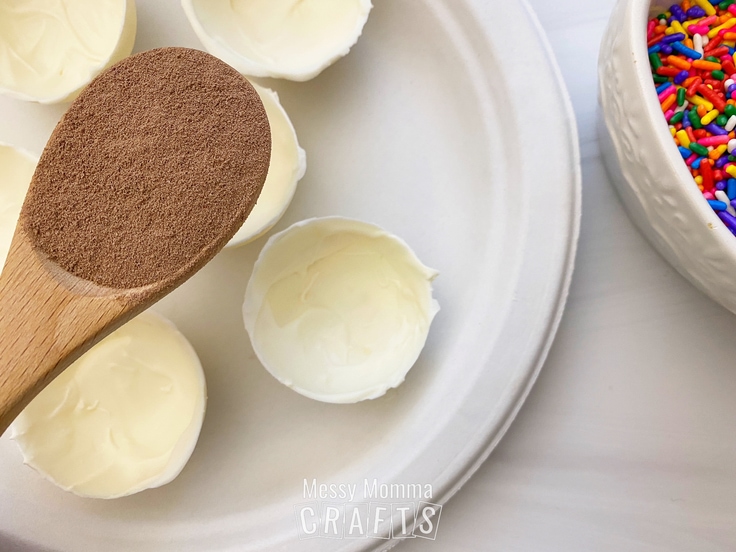
After you take the chocolate out of their molds, add one tablespoon of hot cocoa powder, a handful of sprinkles and a few mini marshmallows into the hollow hemispheres.
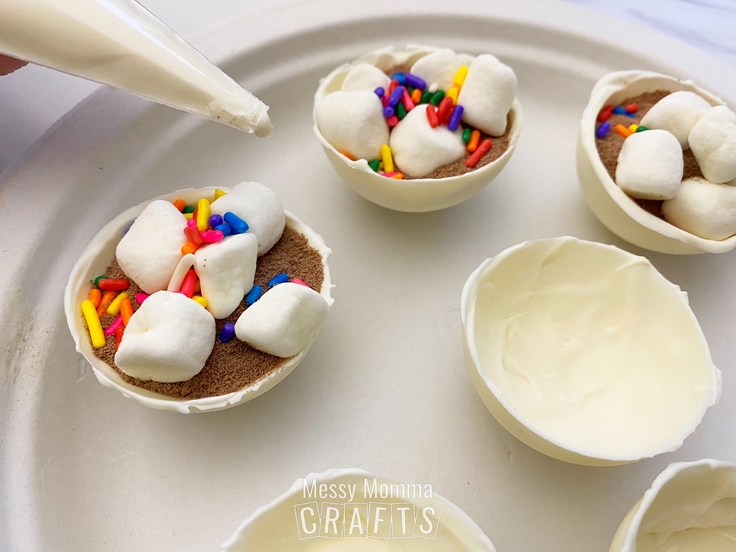
After you cool the chocolate shells, fill a decorating bag with white chocolate and pipe it around the sides of each shell.
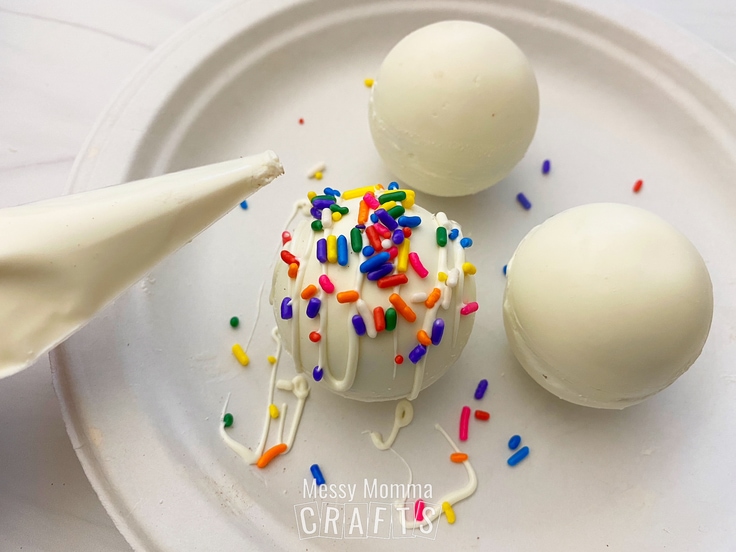
Quickly put the top half of the shell before the melted chocolate dries up. Drizzle the chocolate over the shell to make it look even better!
Birthday Cake Hot Cocoa Bombs
Equipment
- Decorating bag
- Hot cocoa bomb silicone mold
Ingredients
- 2 cups chocolate chips
- 1 cup Hot cocoa powder
- 3 tsp Colorful sprinkles
- 1 cup Mini marshmallows
Instructions
- Place 2 cups chocolate chips in a microwave safe bowl, heat on 50% power in the microwave for 3-5 minutes, stirring every 30 seconds until melted.
- Use a teaspoon to scoop the chocolate into the half circles on the silicone mold, one at a time. Spread the chocolate evenly onto the sides and bottom of mold until completely coated in melted chocolate. Do the same to all 12 half circles.
- Place the silicone molds into the freezer for 2-3 minutes and remove.
- Add a second layer of melted chocolate to the half circles molds, especially on the edges.
- Freeze again for another minute and remove carefully with food safe gloves.
- Carefully stretch the silicone molds to remove the half circles.
- Turn the mold upside down and place the rounded sides in between the molds as a stand while filling.
- Add 1 tablespoon hot cocoa powder, the mini marshmallows and colorful sprinkles to the one side.
- Reheat the chocolate if it has hardened and add 4 tablespoons to a decorating bag.
- Cut a small tip off the decorating bag and frost the edge of one half chocolate circle. Carefully and quickly add an empty chocolate circle on top to make a sphere and hold it in place for 15 seconds or until the chocolate has acted like glue and hardened.
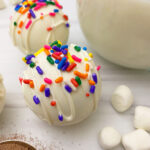
- Place onto a plate, drizzle melted chocolate on top with the decorating bag, and top with colorful sprinkles.
- Let the chocolate harden and place in a glass of warm/hot milk, stir, and watch the bomb melt to see what’s inside or place in an empty glass and pour hot milk on top of the bomb, watching it melt, and then stir.
Enjoying our crafty ideas? Subscribe today to receive our free guide, “From Fridge to Keepsake: 8 Clever Ideas to Preserve Your Child’s Artwork,” plus weekly updates and exclusive offers — all for FREE!
More Winter Recipes
If you enjoyed this Birthday Cake Hot Cocoa Bombs recipe then you will love these winter recipes:
- Snowman Cupcakes – A Winter Treat
- M&M Hot Cocoa Bombs
- Funfetti Cookie Cups With Whipped Cream Cheese Filling

Leave a Reply